MapQuest Road Trip Planner: Planning Your Route
Is there any such thing as a MapQuest Road Trip Planner? Technically, no. But can you use MapQuest as a road trip planner? Sure. Here's how.
The MapQuest Road Trip Planner, Step by Step
Let's assume you're taking a road trip between, say, Redding, California and Joliet, Illinois. Here's how you'd use the planner to plot out every mile of your journey.
Note that as of 2016, Mapquest.com has received a pretty serious facelift. The changes actually make it a little easier to plan a multi-stop road trip. We love the new look, and we've updated our instructions here to reflect the new layout of the site.
1. Go to Mapquest.com and click Get Directions in the left sidebar.
2. MapQuest only lets you enter a starting and ending location at this point. But you're trying to plan a rambling road trip with many interesting stops! Don't worry.
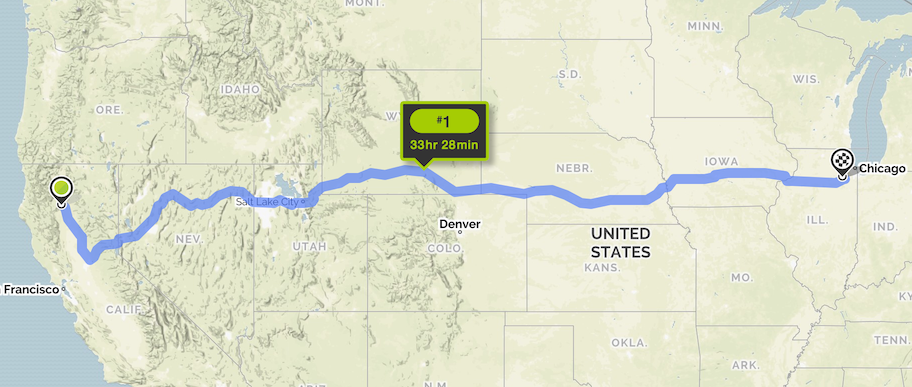
Just enter your starting and ending cities for now, and then click Get Directions. MapQuest will serve up a summary of your trip in the left sidebar:

Meanwhile, in the main window, you'll see your route plotted out on the map:
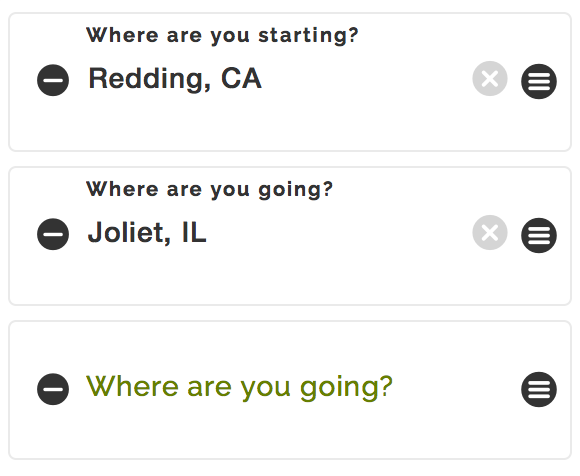
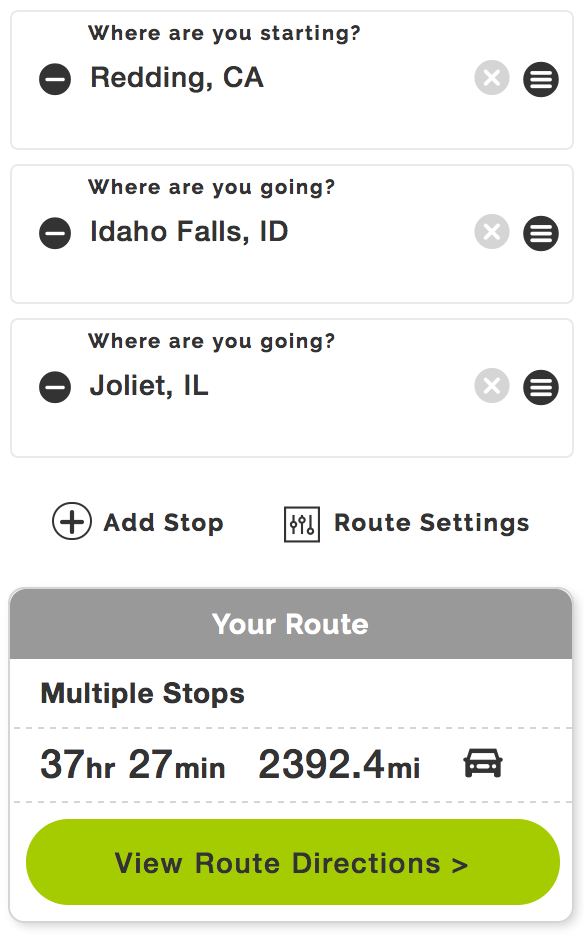
3. In the left sidebar, did you notice that Add Stop button? That's key. Click it. You'll now see a "Where are you going?" box appear beneath your trip's starting and ending points:
4. Now, suppose you really wanted to stop and visit friends in Idaho Falls. Enter Idaho Falls, ID in the Where are you going? box, and then press Return or Enter on your keyboard. (As you begin typing, MapQuest may pop up the name of your destination. You may also simply click the name in the pop-up box to add it to your trip.)
The MapQuest Road Trip Planner will add Idaho Falls to your route. The only problem is, it's added onto the end of the trip. Let's fix that.
5. Off to the right of the Idaho Falls box on your road trip route, there's a little black circle with three white lines in it. This is the Drag to Sort button:
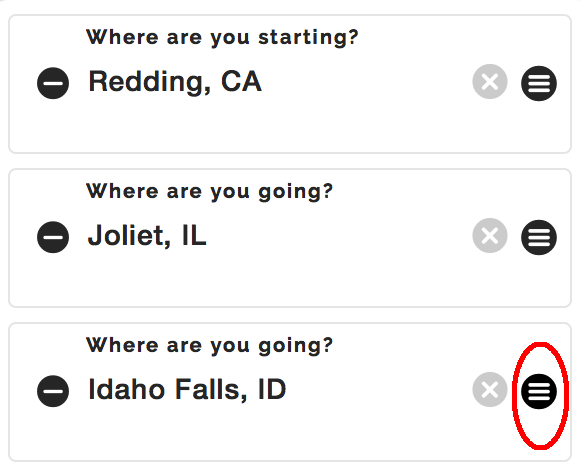
Put your mouse pointer over it, click, and drag Idaho Falls up so that it comes after Redding but before Joliet. Your trip should now look something like this:
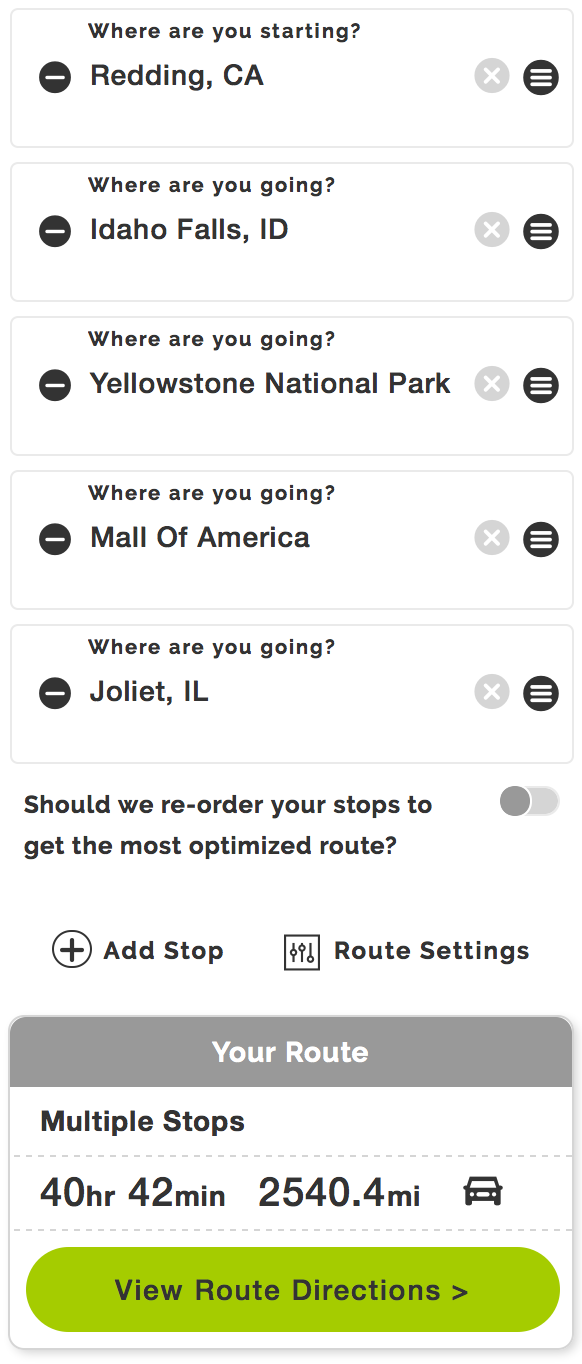
6. Repeat steps 4 and 5 for any other stops you would like to plan. In other words, click Add Stop for each new stop, type the city name into the box, and then use Drag to Sort to move that stop up or down in your route.
One great time-saving feature is that you can actually add place names, rather than city names, to your route. For example, maybe you want your trip to include Yellowstone and the Mall of America. There's no need to find city names for those attractions - you can simply type in the place names, and MapQuest will find them.
As you work, you'll notice your route changing on the big map of America (or Canada, or wherever you're planning your trip) off to the right.
Remember to click Get Directions each time you add a stop. MapQuest will update your route on the map to the right as well as the timing and mileage of your road trip in the left sidebar.
7. Once you've finished adding stops, you'll end up with something like this:
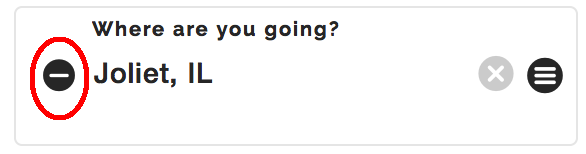
From here, you can play around with your route until you're perfectly happy with it. If you change your mind about one of your stops and want to remove it from your trip, simply click the little black circle with the white line in it off to the left of the place name:
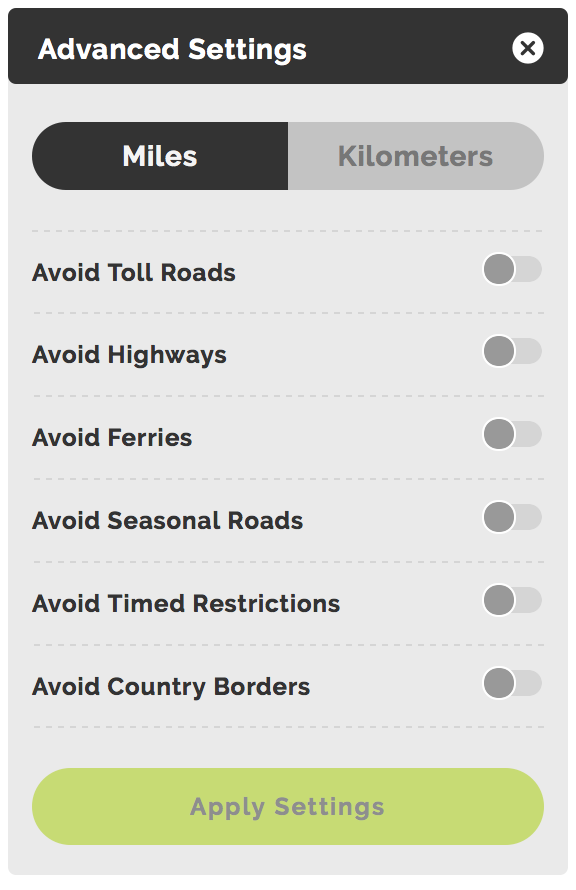
If you really want to get fancy with your directions, try clicking Route Settings in the left sidebar. You'll be able to fine-tune your trip according to more specific guidelines:
Can you seen now why we love the MapQuest Road Trip Planner? It's a fun and intuitive way to plan any long car trip.
Tell Us About the Trip You're Planning
Are you planning an epic road trip? We'd love to hear about it.
What Other Visitors Have Said
Click below to see contributions from other visitors to this page...
Road Trip 
I want to know the best route for road trip from Philadelphia to La Verne.
ANSWER:
Meng, to answer your question, there are three major routes between …
Maritime Vacation Not rated yet
We plan to leave Sault Ste Marie, Ontario on Jul 5. We are travelling by MH. Want to go about 400 miles per day. First stop is Pembroke, ontario. Need …
Canada, US Not rated yet
Four friends from Denmark, we are planning a road trip through the States and Canada. We are going to start in Vancouver and travel all the way down the …
Milwaukee to Tampa in April Not rated yet
Driving from just outside of Milwaukee to outside of Tampa in mid April. Using Mapquest to help plan it.
RESPONSE:
Sounds like a fun trip, Gregg! …
Florida bike tour Not rated yet
I am going on a trip from Normal, IL,to visit relatives and ride paved bike trails in Florida. I plan on stopping in Nashville, Alpharetta, GA, Cedar …
Kelowna 2012 Not rated yet
Mommies, Kiddies, and Nannies Road Trip to Kelowna. The dad's are off to Scotland on a golf trip so we decided to take the kids (and us) on a distraction …
Big Move Not rated yet
Moving from Las Vegas, NV to Ardsley, New York. We will be stopping in Fairview Heights , IL and Effingham, IL to visit family on the way.
ANSWER:
…
Canada and US Not rated yet
Friends from Germany are coming over so we are planning a road trip through the States and Canada. We are going to start in Vancouver and travel all the …

New! Comments
What do you think about all this? Leave us a comment below.